4 KiB
Run Multiple Instances of the Same Linux Distro on WSL
Step 1.1: Open "Settings"
Step 1.2: Click on "Apps"
Step 1.3: Click on "Installed Apps"
Step 1.4: Select Linux Distro Name --- e.g., Ubuntu 22.04.1 LTS
Step 1.5: Click on the "Advanced Options" link
Step 1.6: Click on the "Reset" button to reset your Linux Distro (e.g., Ubuntu 22.04.1 LTS) to the initial install state. Please note that everything will be deleted.
Step 1.7: When the reset is completed, start your Linux Distro (e.g., Ubuntu 22.04.1 LTS) then set up your Linux Distro by entering both username and password.
Step 1.8: Run "sudo apt-get update" (for Ubuntu 22.04.1 LTS) to retrieve information about what packages can be installed, including what updates to currently installed packages are available, from Internet sources.
Step 1.9: Run "sudo apt-get upgrade" (for Ubuntu 22.04.1 LTS) to install available upgrades of all packages currently installed on the system from Internet sources.
2. Export Linux Distro on WSL
The second step is to create an export image of your Linux Distro. This image will be used to create multiple instances of the same Linux Distro.
Step 2.1: Open a new command prompt or a new Powershell.
Step 2.2: Run the command
wsl --list
to view a list of Windows Subsystems for Linux Distributions installed on your computer. For example on my computer, it would be "Ubuntu-20.04".

Step 2.3: Run the command
wsl --export <DistributionName> <FileName>
or
wsl --export Ubuntu-22.04.1 rootfs.tar.gz
to export your Linux distros to a TAR file. This will create a file entitled "rootfs.tar.gz" on your computer. Keep this file safe since you will need this file to create a new instance of the WSL Linux Distro.

Step 2.4: Copy the newly created file named "rootfs.tar.gz" to your desired directory. For example on my computer, I have copied the file to c:\linux directory.
3. Install a New Instance of the Same Linux Distro on WSL
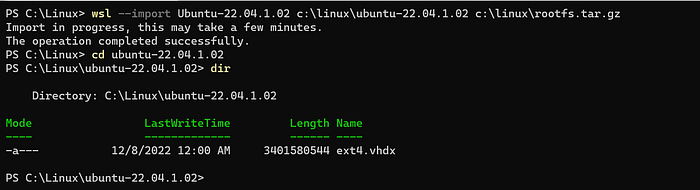
Step 3.1. Open a new command prompt or a new Powershell then run the following command to import exported instance as a new instance of Linux in WSL.
wsl --import DistroName InstallationPath ExportedFileLocation
for example,
wsl --import Ubuntu-22.04.1.02 c:\linux\ubuntu-22.04.1.02 c:\linux\rootfs.tar.gz
I have named DistroName as Ubuntu-22.04.1.02 to specify this is Ubuntu 22.04.1 Instance 2.
For WSL2, the installation process should create "ext4.vhdx" file. Delete copied "rootfs.tar.gz" after the installation is completed.
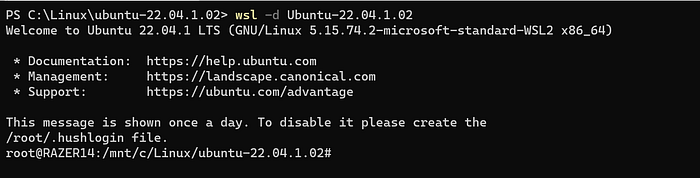
Step 3.2. Run the newly imported Linux distro.
wsl -d DistroName
for example
wsl -d Ubuntu-22.04.1.02
This should start the new instance of Linux Distro in WSL.
Step 3.3. Configure new Linux distro by creating "/etc/wsl.conf" file.
then enter the following to wsl.conf file then save the file. This is needed to replicate the default behavior of your default Linux distro instance on WSL where you are logged in as a specified user and mounted to its home directory.
[automount]
enabled=true
root=/
[user]
default=sungkim
[interop]
appendWindowsPath = false
[boot]
systemd=true
Please note that you will have to change your username (e.g., sungkim). For more information on wsl.conf, please refer to this website from Microsoft => https://learn.microsoft.com/en-us/windows/wsl/wsl-config.
Step 3.4. Restart Linux Distro
Exit out of Linux Distro
exit
then from either the command prompt or PowerShell, enter
wsl --shutdown
Close Windows Terminal then restart Windows Terminal. A new WSL instance will just show up in Windows Terminal. In Windows Terminal, click on drop-arrow then select the Linux distro name (e.g., Ubuntu-22.04.1.02) to start your new terminal session.